
Bought a compound miter saw but forgot to buy a table to put it on? Fear not because we will teach you how to build a miter saw stand using the saw you bought!
However, a quick workaround to this issue would be to simply refer to this guide on SawSeekers and just choose one of those.
The Type of Stand
First you must decide upon the kind of stand you want. There are many options to choose from and given that this is a DIY project, you can start off with just a simple sturdy base to fix your miter saw onto and the rest of the stand can be whatever your imagination desires.
Some kinds of stand designs include:
- Stand and table with adjustable legs and wings
- A Basic stand which is portable
- Stand and table with mobility (added wheels to the base of the stand)
- A Stand with a cover to collect dust and with a dust collection duct
- Attaching a Miter Saw to a sturdy base board and placing it on any table in the shop
So, as you can see these ideas are simply creative thoughts that are waiting to come into fruition. This article will showcase a few designs which will vary in complexity:
- A Portable Miter Saw Stand
2. A Mobile Miter Saw Stand
3. A full Miter Saw work table with dust filtration system
We specifically targeted these three types because they have the most variation between them and each type adds a level of versatility to your that will be very apparent from the moment you set up the saw!
All The Tools
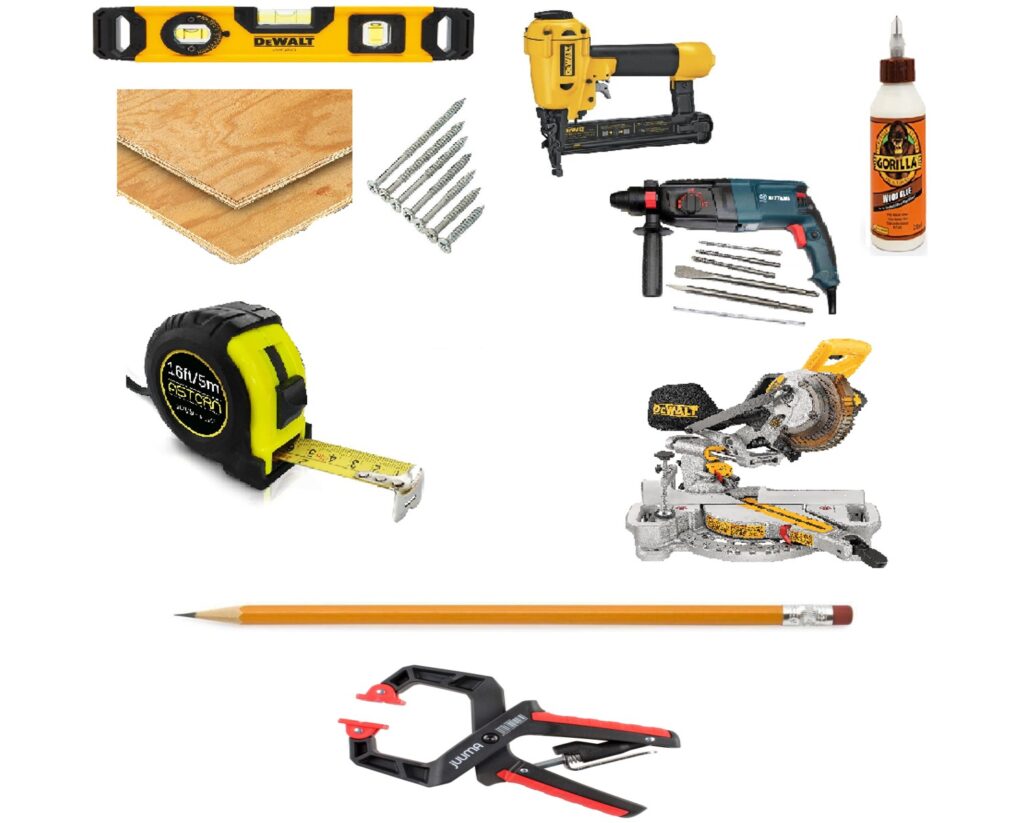
To complete all these tables you will need these few simple tools to get the job done:
- Lumber
- Wood Glue
- Pneumatic Nail Gun
- Drill Machine
- Miter Saw (If you are building a stand for one, safe to assume you already own one)
- Wood Screws
- Measuring Tape
- Spirit Level
- A Pencil
- Hand Clamps
Let’s build some stands!
The Portable Miter Saw Stand
Let’s start with our simplest stand. Even a child could construct this miter saw stand, with our instructions. But best not to let a child do an adult’s job!
For our portable stand we have simply created a thick plywood base to rest our miter saw on and extended the left and right sides so that the pieces you work on can rest easily during cutting. All the other variations of our miter saw stands will use this same base design to house the miter saw.
Step 1
Get a sturdy piece of plywood to act as the base upon which the miter saw will rest.
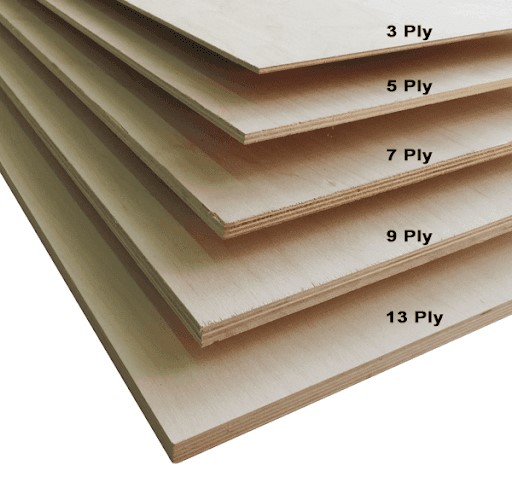
A 9 ply should be good enough thickness to create a sturdy stand and also make it sufficiently light and portable.
Step 2
Place your miter saw on the base board. Make sure the orientation of your saw is correct. Use your pencil and mark the outer edges of the saw on the board and create marks through the screw holes on your saw.
Step 3
With the miter saw still in position on the base board fit two rectangular blocks of wood snugly on the left and right edges of the miter saw. Make sure using a level that the top of the blocks are 1/8th of an inch shorter than the base of the miter fence. Use your miter saw to cut the blocks into shape as necessary.
Step 4
Move through all the bevel and miter angles with the blocks still in place on the baseboard. Ensure fluid and unhindered movement of the saw along with its side fences.
Step 5
Once you are satisfied with the shape of the side blocks, make 6 more copies of these blocks. Use your wood glue to glue the initial side blocks into place. Clamp these into position as they dry to ensure a sturdy fit.
Step 6
Now, determine how long you want your miter saw stand to be on either side (the length of the side wings of your stand). Once decided, place the other rectangular block along the length of the board on either side, equidistant from each other. Glue these into place, clamp them to ensure a tight fit and seal on the baseboard.
Step 7
Use your miter saw and cut off the extra bits along all the edges of your stand. Remember that 1/8th inch gap we created between the base of the miter fence and the rectangular blocks (risers)? Get an additional piece of plywood, 1/8th of an inch thick and get ready to glue it on to the risers with the miter saw on the base. Place two seperate pieces of plywood on either side and use the spirit level to make sure that the wings are flush with the base of the fence. Glue the pieces on, clamp them into place and leave them to dry off.
Step 8
Once the glue has dried, in order to add some extra rigidity to your stand use your pneumatic nail gun and put nails on either side of the stand to fix the riser block in position with the base board and top piece. Then drill two holes between the top piece and each riser block. Use the wood screws to create a tight connection between these pieces. Optional: you may repeat this step for the baseboard and the riser blocks.
Step 9
Now finally, place your miter saw in position and make sure it operates smoothly. Drill in holes on the markings you originally made and screw the miter saw into place.
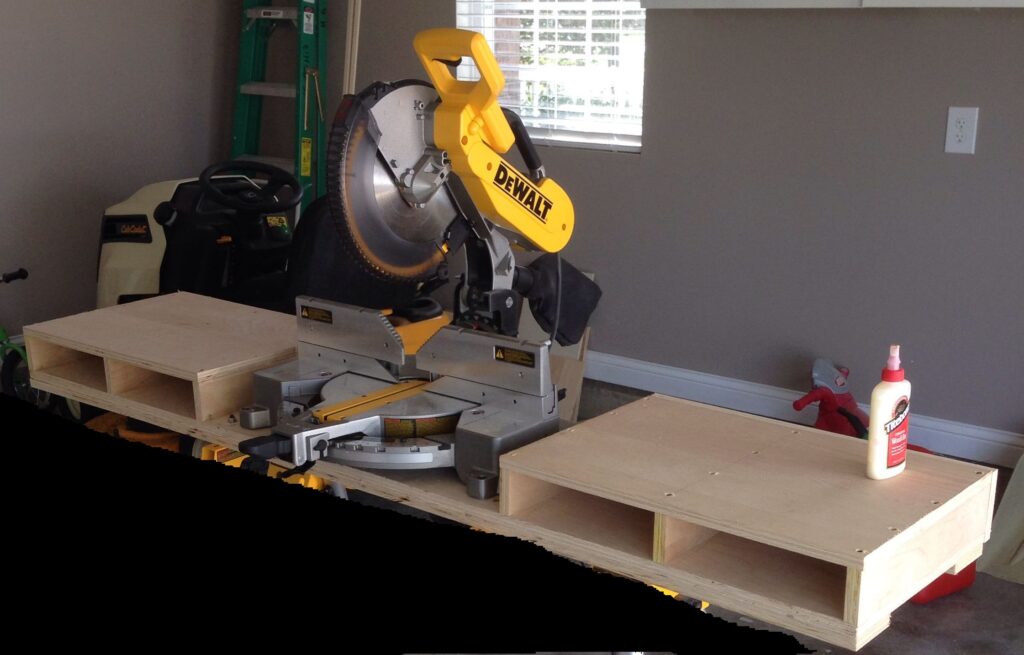
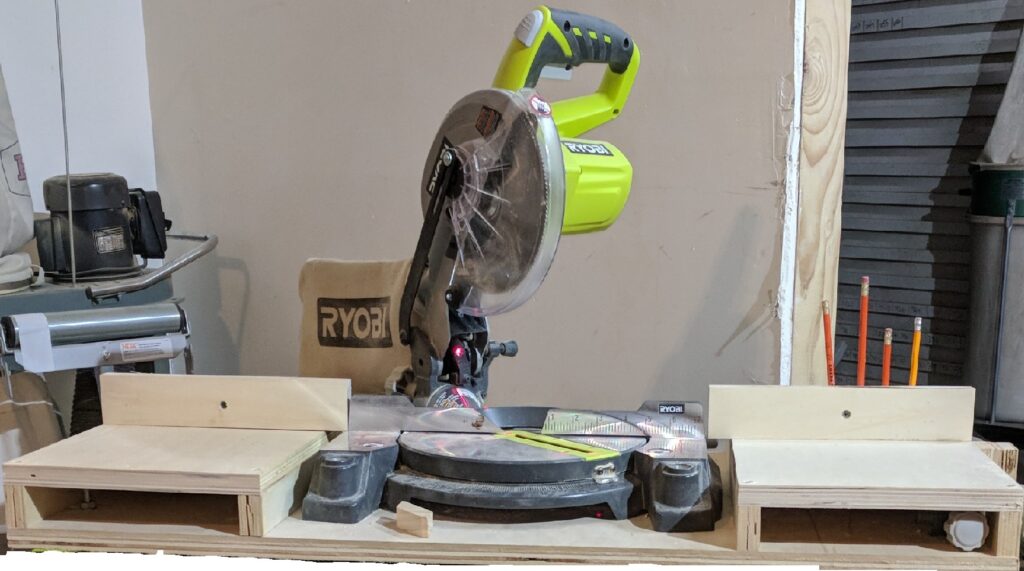
The end product should look like this:
The Mobile Miter Saw Stand
Now that we are done making our basic portable miter saw stand, let’s make something a bit more intricate, a miter saw stand on wheels!
To begin this project we need to pick up from where we left off. Build the basic stand for your miter saw as shown above and then continue on from there.
Step 1
Add a wooden frame or a set of legs to the base of the original portable miter saw stand. Flip the stand and use your pencil to make an outline of the design of the legs or to mark their position on the baseboard. Make sure that the legs are centred properly and that the frame isn’t off-balance.
Step 2
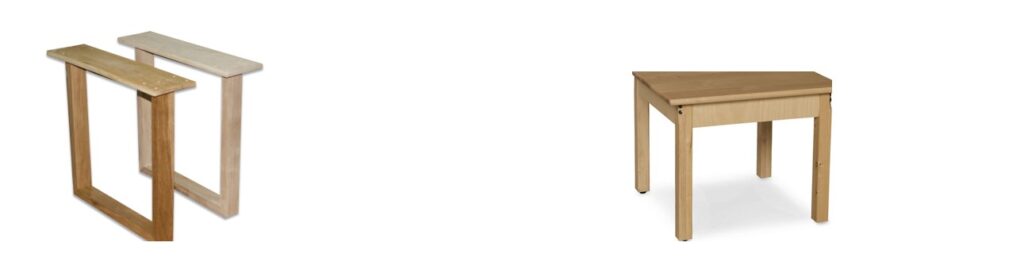
Use your miter saw and cut 4 equally sized rectangular blocks which will act as the legs of your stand. There are many creative ways to design the legs of your miter saw stand. We recommend keeping it simple:
Step 3
Once you have designed and created your legs glue them onto the base of your miter saw stand. Keep them clamped on and once the glue has dried up drill holes between the legs and the baseboard of the miter stand and screw them together using your wood screws. Optional: You can make the setup sturdier by inserting some nails using your pneumatic nail gun.
Step 4
After the legs are in position and fixed tight drill some holes on the bottom end of each leg to insert your wheels.
These are the Workbench Casters – 4 Extra Heavy Duty Retractable casters, 840 lbs. Weight Capacity, Urethane Wheels. We recommend using these wheels because they allow side mounted installation and they come with a braking mechanism, which is perfect for our end goal.
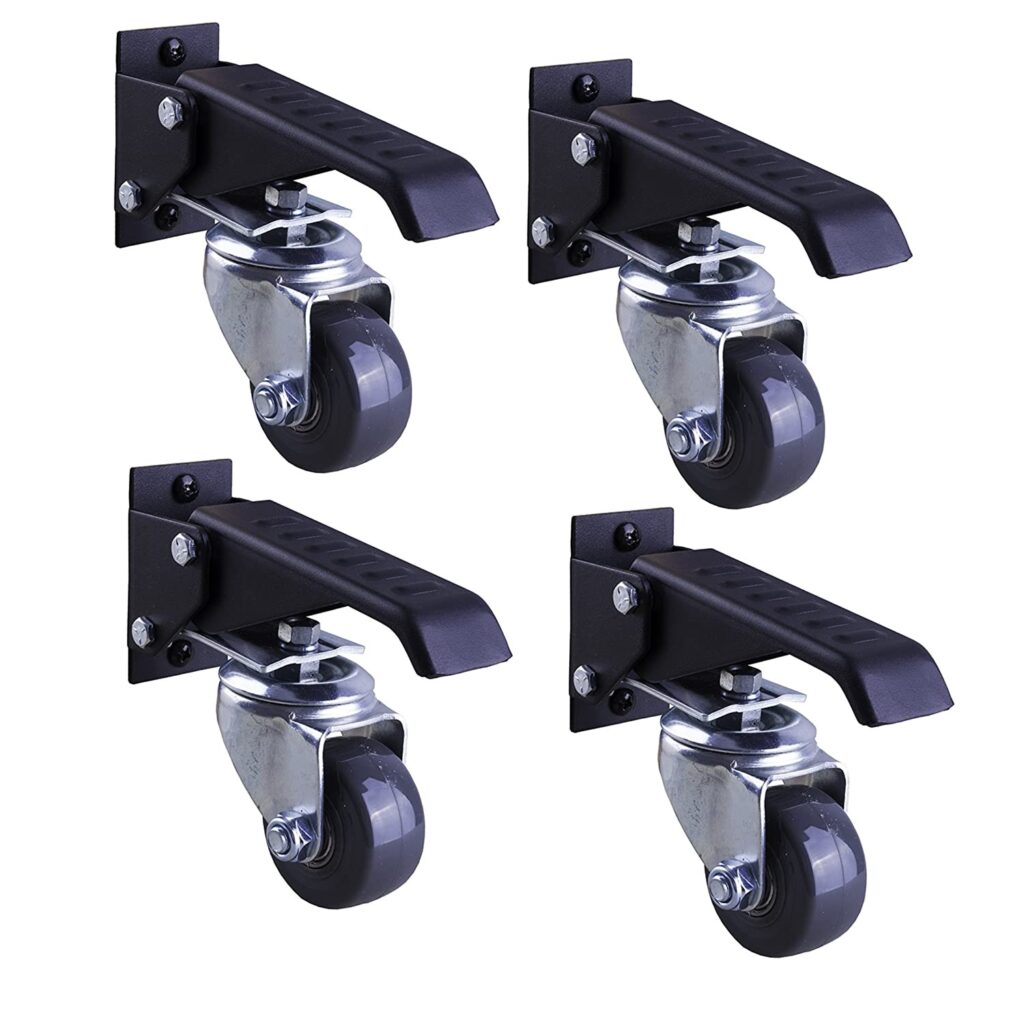
Step 5
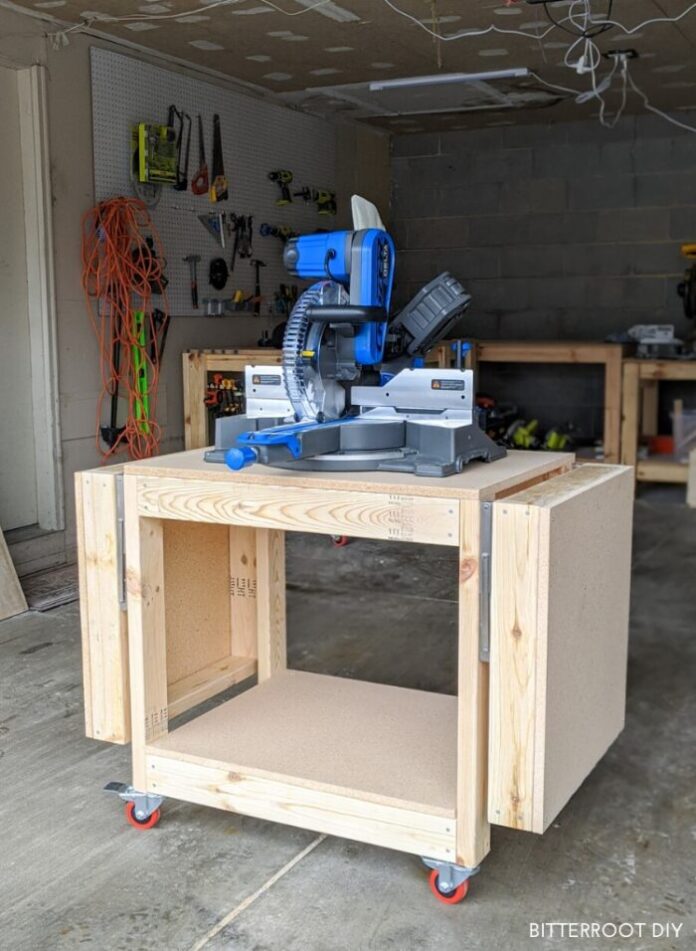
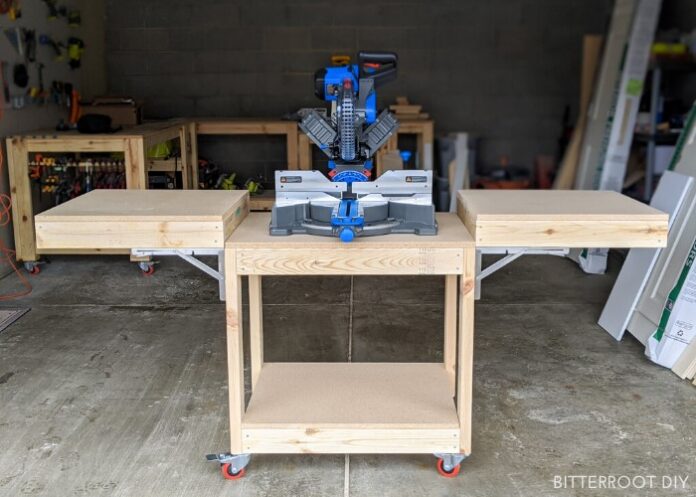
Screw the wheels in, making sure to check their orientation during installation of each wheel. Then flip it over and screw in your miter saw. That’s it, you should be left with a beautiful miter saw work table, which is mobile. Here is an example of what the end product could look like:
A Full Miter Saw Work Table with dust Filtration System
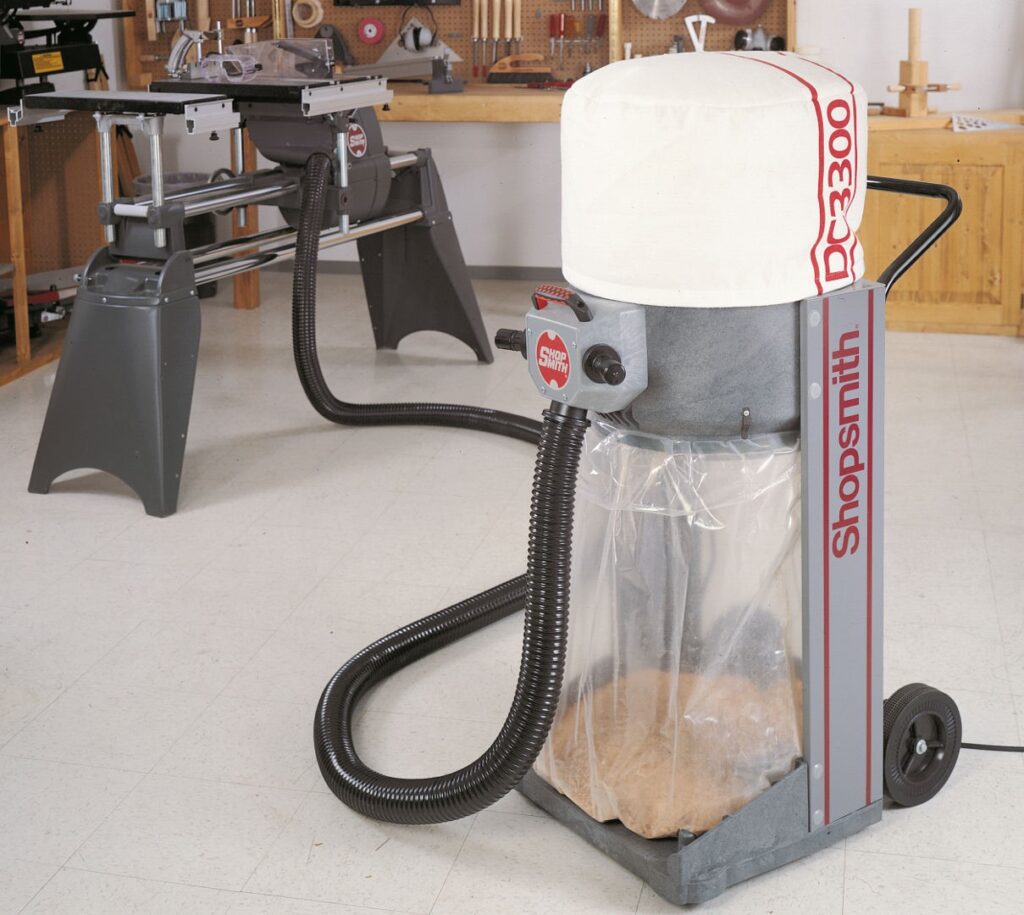
This is probably the most complex design we can showcase, but there is purpose to it’s intricacies. This last table will require an additional attachment, the dust filtration system.
Proper wood dust collectors may be a bit expensive for some. We would recommend replacing this with a normal vacuum and jerryrigging it to fit the purpose.
With this last project we can continue augmenting our previous end product, the mobile miter saw work table. All we will need to add is a hood around the saw to catch the dust and a cut out at the base where the dust generally collects. This cut out will serve as an insertion point for our vacuum pump.
Step 1
If you are starting from the latest table version in our article, the mobile miter saw work table, first take a piece of plywood and position it behind your saw. Use a pencil to draw a rough outline of your saw. Use your miter saw to cut this design into the plywood.
Step 2
Once the cut is complete, vertically place the plywood on the saw and use your free hand to make adjustments to the miter angles and bevel angles of your saw. Make sure the plywood doesn’t hinder the movement of your saw and is positioned behind the miter fence.
Step 3
Wear a mask and woodworking goggles, and with the plywood still mounted turn on your saw and cut some scrap material. Notice where the wooden dust tends to fly off and where it settles. Adjust the position of your plywood cut out so that it can act as a shield. The flow of dust should be behind the plywood. Mark the position of the plywood on your table.
Step 4
This piece of plywood you are left with will be the front of our miter saw dust collection box. Set it aside and glue a vertical piece of plywood on to the back of the miter saw table, positioned right behind the saw. Drill holes between this extra piece and the base of your miter saw table and screw them together.

Step 5
Measure the radius of your vacuum head. Draw the outline of the head on the base of the board toward the back corner, flush against the newly installed back board.
If you have a handsaw you can cut out the circular disk and install the vacuum. If you don’t have one simply use a large drill bit and drill a few holes to allow an exhaust port for the vacuum.
Step 6
Add wooden extension panels to the front plywood cut out so that you create a box that will collect wood. The wooden panels should be as long as the marking you originally made of the position of the plywood shield on your miter saw table. Glue these panels onto the plywood face and then glue the entire setup to the backboard. Attach the head of the vacuum to the base exhaust holes using duct tape. Your setup is now complete. Simply turn on the vacuum before operating your miter saw and get on with your woodworking endeavours!
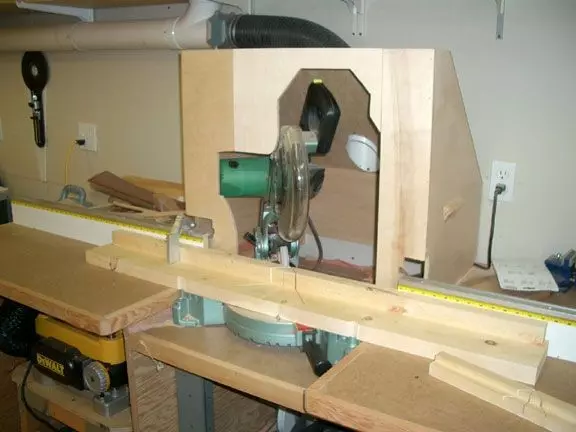
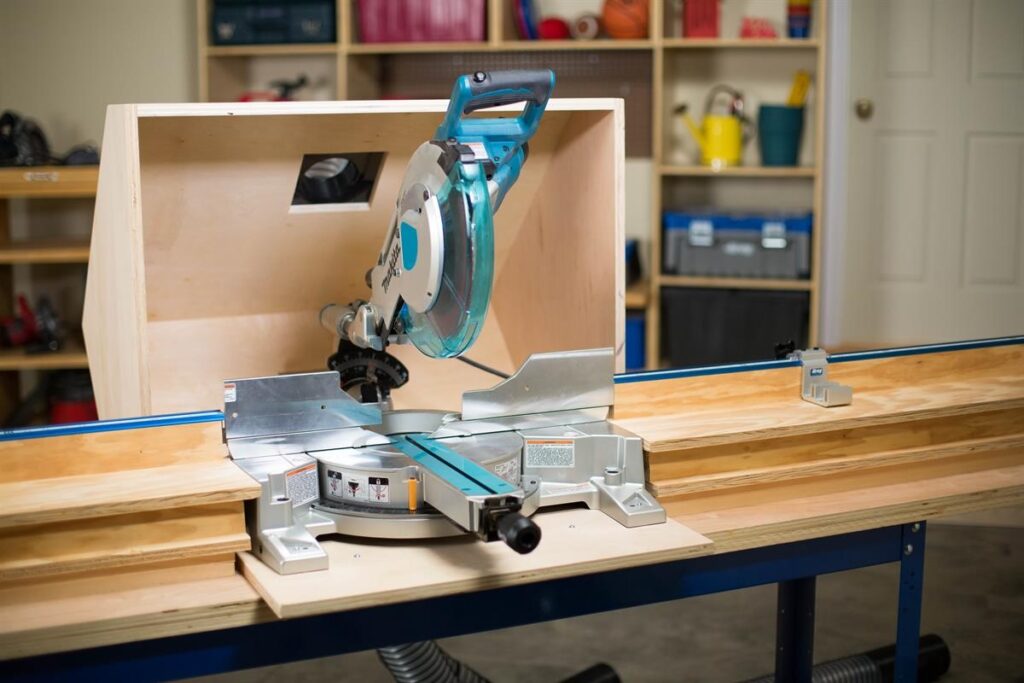
This is an example of a miter saw station with dust collection. However, if you follow our instructions your end product will have a much cleaner finish and will collect dust with a lot more efficiency. During the operation of the saw once the vacuum is switched on you will notice that for the first time after using your miter saw, which is notorious for creating a dusty mess, there is no cleanup required afterwards. The wood dust is instantly collected by the vacuum, leaving little or no residue.
Thanks for reading our article and for your continued support. Keep crafting wooden masterpieces and share this article if you found it helpful!


