
Custom diamond painting is a captivating art form that combines painting by numbers with the beauty of sparkling diamonds. It involves creating a personalized masterpiece by placing tiny, shimmering resin diamonds onto a canvas, resulting in a stunning, eye-catching work of art. Unleash your creativity and embark on a mesmerizing journey as we take you through the process of designing and ordering your very own custom diamond painting.
From selecting the perfect image to the final touches of placing the dazzling diamonds, this comprehensive guide will empower you to create a unique and awe-inspiring work of art that truly reflects your vision and style.
Get ready to bring your imagination to life and immerse yourself in the world of custom diamond painting!
Why A Custom Diamond Painting?
With a customized diamond painting, you have the opportunity to bring your imagination to life. Instead of following a pre-designed pattern, you can create a unique masterpiece that reflects your personal style and preferences. It allows you to express your creativity by choosing your own image or design. Custom diamond paintings hold sentimental value as they can be tailored to your individual interests and memories.
The custom design adds a personal touch that traditional diamond paintings lack. It becomes a one-of-a-kind piece of art that holds deep significance for you. When ordering a custom diamond painting, you have control over the size and level of intricacy. You can choose the dimensions that suit your preference and the level of detail you’re comfortable with. This flexibility allows you to take on a project that matches your skill level and time commitment.
Understanding Different Drills In Custom Diamond Painting
You can work with any drills which you like the most for custom diamond painting. There are three main categories: round drills, square drills, and special shaped drills. Let’s explore different drills with their pros & cons!
Round Drills For Custom Diamond Painting
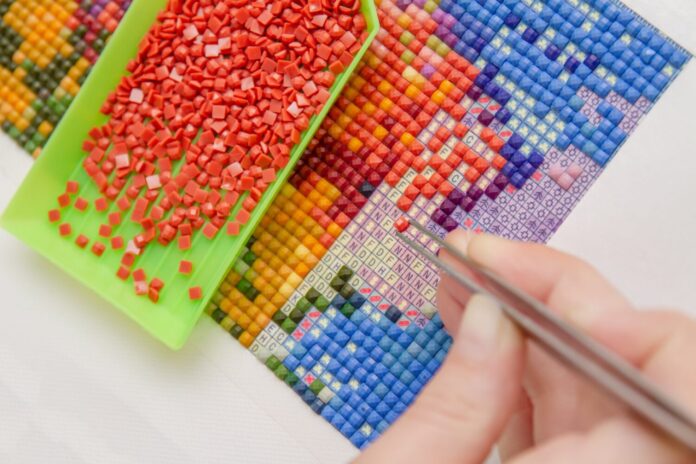
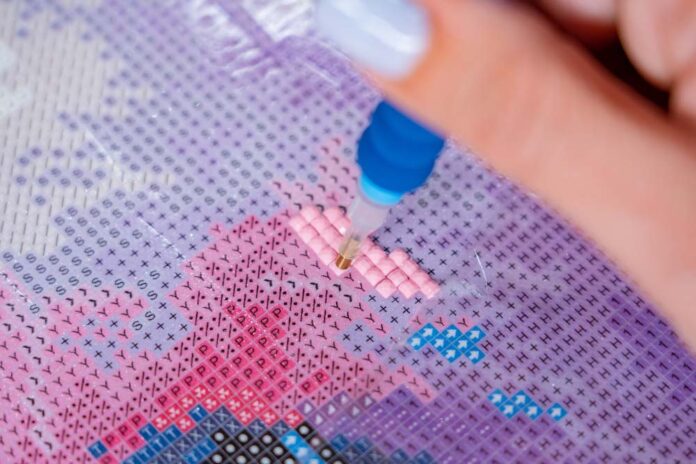
Round drills are one of the most commonly used types of drills in custom diamond painting. These drills are small, circular-shaped resin gems that have a flat top and faceted sides. They are often referred to as “diamonds” due to their sparkling appearance when light reflects off the facets. Round drills typically come in various sizes, with the most common being 2.5mm or 3mm in diameter.
They are available in a wide range of vibrant colors, allowing artists to create detailed and colorful artworks. The flat top of round drills makes them relatively easy to place on the canvas. They have a smooth surface, allowing for a uniform and seamless look when the painting is complete. Round drills also provide a satisfying tactile experience as they fit neatly together on the adhesive canvas.
Advantages and Disadvantages of Using Round Drills:
- Ease of placement: The round shape and flat top of these drills make them simple to position on the canvas, even for beginners.
- Smooth and seamless finish: When the round drills are closely placed together, they create a smooth and seamless surface, enhancing the overall appearance of the artwork.
- Wide color variety: Round drills are available in a vast array of colors, giving artists the flexibility to create vibrant and detailed designs.
Disadvantages
- Less precise details Due to their circular shape, round drills may not provide the same level of intricate detail as square drills.
- With less edge-to-edge coverage, Round drills leave tiny gaps between each gem, resulting in a minimal amount of adhesive showing through.
Overall, round drills are a popular choice for custom diamond painting enthusiasts due to their ease of use, wide color selection, and ability to create a beautiful, sparkling finished product.
Square Drills
Square drills are also commonly used in custom diamond painting. They are called square drills because they have a square shape with four equal sides. These drills have an edge surface and fit tightly together when placed on the canvas, creating a seamless and polished finish to the artwork.
Advantages of Using Square Drills:
Square drills offer several advantages that make them a popular choice among diamond painting enthusiasts:
- Neat and precise finish: The square shape of the drills allows them to fit snugly together, creating a more uniform and precise appearance.
- Enhanced detail: Due to their straight edges, square drills can provide better clarity and detail, especially in designs with intricate patterns or small areas.
- Increased coverage: Square drills cover the canvas more completely compared to round drills, leaving minimal gaps between the drills.
- Easier placement: The flat surface of square drills makes them easier to handle and place accurately on the canvas.
- Variety of designs: Many custom diamond painting kits come with square drills as the default option, providing a wide range of designs to choose from.
Disadvantages of Using Square Drills:
While square drills have numerous benefits, they also have a few limitations:
- Limited variety: Square drills are not as widely available as round drills, so the selection of colors and designs might be more limited.
Square drills are a versatile option for custom diamond painting, offering a clean and detailed finish. Whether you prefer the precision they provide or want to try a design that specifically uses square drills, they can add an extra level of sophistication to your diamond painting projects.
Specialty Drills
Specialty drills refer to unique types of drills that add extra sparkle, shine, or special effects to custom diamond paintings. These drills are often used to enhance specific areas of the artwork or create a stunning overall visual impact. The following are some examples of specialty drills commonly used in custom diamond painting:
- Crystal Drills: Crystal drills are made from transparent or translucent materials, such as acrylic or resin, and have a faceted surface that reflects light beautifully. When placed on the canvas, crystal drills create a stunning diamond-like effect, adding depth and brilliance to the artwork.
- AB (Aurora Borealis) Drills: AB drills are coated with a special iridescent finish that gives them a captivating rainbow-like shimmer. These drills are popular for creating a magical and ethereal look in custom diamond paintings. The AB coating reflects different colors depending on the angle of light, adding a dynamic and eye-catching element to the artwork.
- Metallic Drills: Metallic drills are made from metal or have a metallic coating that adds a lustrous and reflective quality to the diamond painting. These drills come in various finishes, such as gold, silver, or copper, and are commonly used to highlight specific areas or create a metallic sheen in the artwork. Metallic drills can add a touch of elegance or create a striking contrast against other drill colors.
Specialty drills offer artists the opportunity to add unique visual elements to their custom diamond paintings, elevating them beyond the traditional diamond look. Incorporating these drills can help create a personalized and captivating piece of artwork that stands out with its distinct shine and special effects.
Factors To Consider When Selecting Drills

When embarking on a paint with diamonds project, it is crucial to carefully consider the drills you will use. Several factors play a role in determining the most suitable drills for your artwork:
Size and shape of the canvas
The dimensions of your canvas should guide your choice of drills. Smaller canvases may benefit from smaller drills to achieve finer details, while larger canvases can accommodate larger drills for a bolder appearance.
Desired level of detail and precision
The intricacy of your design will influence the type of drills you need. If your artwork requires high levels of detail, smaller and more precise drills, such as square drills, may be preferable. For simpler designs, round drills can suffice.
Personal preference and artistic vision
Your own preferences and artistic vision should not be overlooked. Consider the overall aesthetic you wish to achieve and how different drill shapes and finishes may contribute to that vision. Some artists may prefer the crisp edges of square drills, while others may opt for the smoothness of round drills.
Tips For Matching Drills To Your Design
Once you have assessed the factors mentioned above, you can effectively match the drills to your design and create visually pleasing artwork. Consider the following tips during the selection process:
Color coordination and harmonization
Take into account the color palette of your design and ensure that the chosen drills complement it. Aim for a harmonious combination that enhances the overall appeal of your artwork. You can achieve this by comparing the colors of drills to the colors in your design and making sure they align well.
Experimenting with different drill types for creative effects
Don’t be afraid to experiment with different drill types to add creative effects to your custom diamond painting. Specialty drills like crystal, AB (Aurora Borealis), or metallic drills can bring a unique sparkle or shimmer to specific areas of your artwork. These alternative drill types can create stunning accents or highlight specific elements in your design, adding depth and visual interest.
By carefully considering these factors and following these tips, you can choose the right drills for your custom diamond painting project, resulting in a finished artwork that meets your expectations and showcases your artistic vision.
Best Practices For Handling Drills During The Painting Process
Proper handling techniques not only prevent damage to the drills but also help maintain their adhesive properties and enhance the overall quality of your artwork. By following these diamond painting drills storage tips, you can minimize the risk of drill loss, improve accuracy in placement, and achieve a stunning result that showcases the intricate details of your custom diamond painting.
Clean hands: Ensure your hands are clean and dry before handling the drills to prevent any dirt or moisture from transferring onto them.
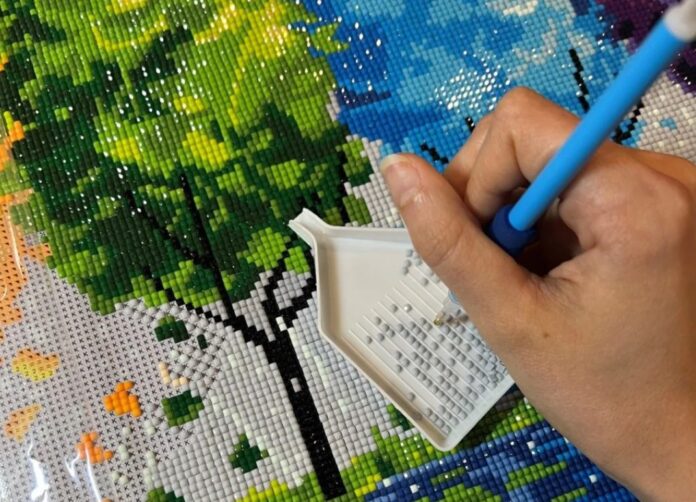
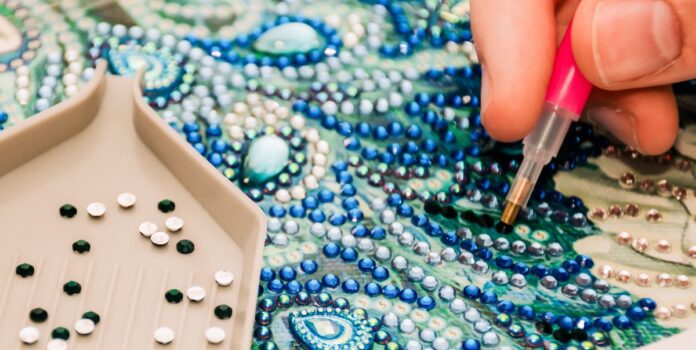
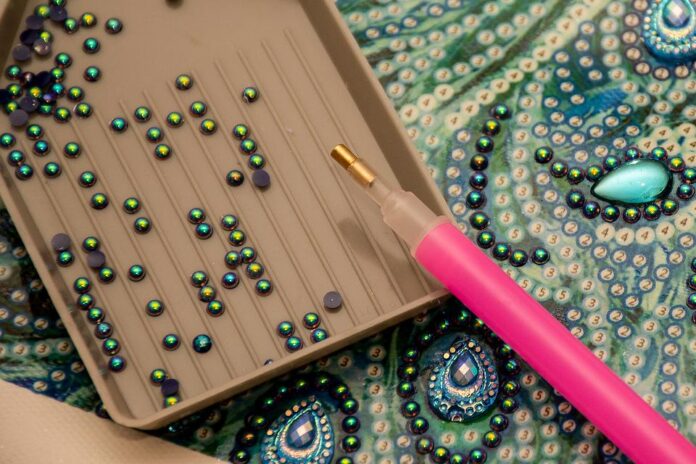
Use tweezers or applicator: Use a pair of tweezers or a drill applicator tool to pick up and place the drills onto the canvas. This helps maintain their shape and prevents accidental dropping or misplacement.
Avoid excessive pressure: Apply gentle pressure when placing the drills on the adhesive surface. Pressing too hard can cause damage to the drills or dislodge them from the canvas. You can use specially designed accessories for pressure.
Work in small sections: To prevent confusion and minimize the risk of drills getting mixed up, work on one small section of the canvas at a time. This ensures better accuracy and control during the placement process.
Tips For Organizing And Storing Drills To Prevent Damage
Keeping your custom diamond painting drills organized and stored properly is crucial to ensure their longevity and prevent loss or damage. From choosing the right storage containers to implementing labeling systems, these tips will help you maintain a well-organized drill collection and provide you with a hassle-free diamond painting experience.
- Use storage containers: Invest in small, clear containers with individual compartments or small bags specifically designed for storing diamond painting drills. This keeps them organized and reduces the chance of spills or mixing.
- Labeling: Label the containers or bags with the corresponding color codes or symbols to easily identify the drills and find the ones you need for future projects.
- Keep away from moisture and direct sunlight: Store your drills in a cool, dry place away from direct sunlight to prevent discoloration or damage caused by moisture. Exposure to sunlight can also fade the colors of the drills over time.
- Prevent spills and mix-ups: Ensure the containers or bags are securely closed to prevent accidental spills or mixing of drills. Consider using separators or dividers to further prevent the drills from mixing within the containers.
- Store in an upright position: Keep the storage containers or bags in an upright position to prevent the drills from shifting or getting jumbled. This helps maintain their shape and prevents unnecessary wear and tear.
By following these best practices for handling and storing diamond painting drills, you can ensure their longevity and keep them organized for future projects.
Why Different Drills For Custom Diamond Painting?
Custom diamond painting lovers must know how different drills can enhance the overall custom diamond painting experience. Let’s know the various ways in which drills can be used to add texture, depth, and visual effects to the artwork, elevating its visual appeal and making it more captivating.
Adding Texture And Depth With Different Drills
How different drills can be used strategically to add texture and depth to a custom diamond painting? You can use different custom diamond painting drills to enhance such as gradient effects, shadowing, and layering to create a three-dimensional look and enhance the overall visual impact of the artwork.
Creating Stunning Visual Effects with Drill Combinations
Custom diamond painting drills make creative possibilities for combining different types of drills in a single custom diamond painting. It works on techniques such as using square drills for outlines and round drills for filling, or incorporating specially shaped drills as accents, resulting in visually striking and dynamic compositions.
Troubleshooting Common Drill-related Issues
When engaging in the art of custom diamond painting, it’s not uncommon to encounter certain challenges with the drills used in the process. From drills popping off the canvas to difficulties in picking them up or encountering drill color discrepancies, these issues can be frustrating for artists. we will explore some common custom diamond painting drill-related issues and provide effective solutions to help you overcome them.
Drill Popping off the Canvas
Drill popping off the canvas is a frustrating issue that many diamond painting enthusiasts encounter during their creative journey. It can disrupt the flow of your artwork and compromise the overall integrity of the design. Know the Causes of Drill Detachment and Potential Solutions
- Insufficient adhesive on the canvas: Check if the canvas has enough adhesive to hold the drills securely. If not, apply a thin layer of adhesive using a suitable glue or adhesive pen.
- Inadequate pressure during drill placement: Ensure that you press the drills firmly onto the canvas after placing them. Use a drill pen or tweezers to apply consistent pressure and improve the bond between the drill and the canvas.
- Improper drill placement technique: If drills are not placed accurately or if they overlap with neighboring drills, it can lead to weak adhesion. Take your time to place each drill correctly, aligning them precisely within the designated areas.
- Environmental factors: Excessive humidity or temperature fluctuations can affect the adhesive strength. Store your diamond painting project in a cool, dry place to minimize the risk of drill detachment.
Difficulty Picking Up Drills
When engaging in the captivating world of custom diamond painting, one of the common challenges artists may encounter is difficulty in picking up drills. Here are Strategies to Improve custom diamond paintingDrill Adhesion and Ease of Use.
- Wax or adhesive replacement: If you’re using a wax or adhesive pad to pick up drills, ensure that it has enough tackiness. If it loses its stickiness, replace it with a fresh one.
- Use a different tool: Experiment with different types of drill pens or tweezers to find a tool that provides a better grip and control. Some artists find that a certain type of tool works better for them.
- Adjust pressure and technique: Apply gentle pressure when picking up drills to prevent them from slipping or flipping. Practice different techniques until you find one that works best for you.
- Clean the drills: Occasionally, drills may accumulate dust or debris, making them more challenging to pick up. Use a soft, clean brush or compressed air to remove any particles from the drills before picking them up.
Drill Color Discrepancies
Achieving accurate and consistent colors in your artwork is crucial for a visually appealing result. However, variations in drill colors can sometimes occur, leading to a mismatch between the desired shades and the actual drills used.
- Check the color chart: Ensure that you’re using the correct colors according to the provided color chart or key. Verify that the drills you’re using match the assigned colors.
- Lighting conditions: Different lighting sources can affect the perception of color. Examine your diamond painting under natural light or a consistent, neutral light source to ensure accurate color representation.
- Manufacturer variations: Some variations in drill colors can occur due to different manufacturers or production batches. If you notice slight variations, try to use drills from the same batch or manufacturer for consistency.
- Color correction techniques: If there are significant color discrepancies, you can explore color correction methods such as using filters or overlays to adjust the appearance of the drills to match your desired colors.
Remember, troubleshooting drill-related issues requires patience and experimentation. By implementing the suggested solutions and adapting them to your specific circumstances, you can overcome these challenges and create beautiful custom diamond painting artwork.
Care Tips For Custom Diamond Painting
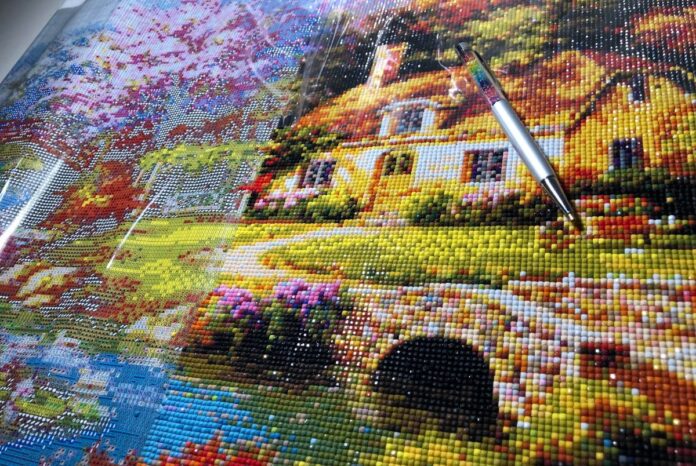
Avoid touching the adhesive surface of the canvas to maintain its stickiness. Ensure your hands are clean and dry before working on your custom diamond painting to prevent dirt or oils from transferring to the diamonds.
Below are the top tips for diamond painting:
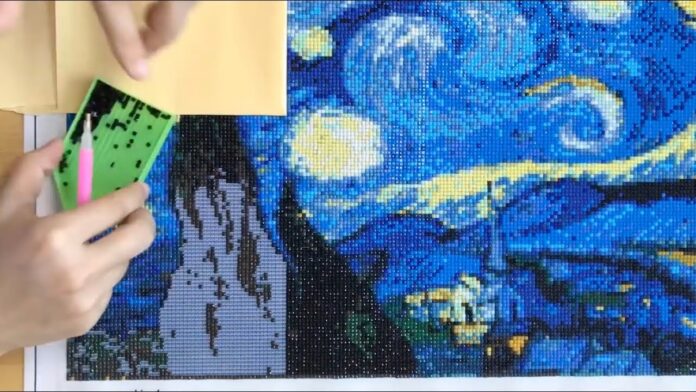
- Store in a flat position: Keep the canvas flat and avoid folding or creasing to preserve its shape and integrity.
- Use a tray or container: Utilize a diamond tray or container to easily access and organize the diamonds during the painting process.
- Secure edges: Apply clear tape or use binder clips to secure the edges of the canvas to prevent the diamonds from falling off.
- Avoid moisture: Keep the diamond painting away from moisture or humidity to prevent damage to the adhesive or diamonds.
- Gentle cleaning: If necessary, gently wipe the canvas with a soft, lint-free cloth to remove any dust or dirt.
- Frame or display: Once completed, consider framing your diamond painting behind glass or using a display case to protect it from dust and preserve its brilliance.
- Avoid direct sunlight: Keep the artwork away from direct sunlight to prevent fading or discoloration of the diamonds and canvas.
- Enjoy and share: Display your custom diamond painting proudly and share the joy of your creation with others.
Why ‘’All Diamond Paintings’’ For Custom Diamond Paintings?
From personalized designs to tailor-made sizes, we offer a platform where your artistic vision can come to life. Discover the endless possibilities and embark on a journey of crafting brilliance with ‘’All Diamond Paintings’’.
Unparalleled Quality
All Diamond Paintings prides itself on offering the highest quality materials for custom diamond painting. From the adhesive canvas to the resin diamonds, every component is carefully selected to ensure exceptional results. See how your chosen design will look once completed with a free preview.
Customization Options
With All Diamond Paintings, you have complete freedom to design your own custom diamond painting. Whether it’s a beloved pet photo, a cherished memory with your child or hubby, or a unique artwork, with a skilled team you can transform it into a stunning diamond painting.
Customize With Confidence
Ensure the colors, details, and overall composition of the diamond painting meet your expectations before placing an order.
Fast Turnaround Time
All Diamond Paintings understands the excitement of receiving your custom diamond painting. With an efficient production process, we strive to deliver your masterpiece in a timely manner without compromising on quality.
Secure Packaging
To ensure that your custom diamond painting arrives in pristine condition, ‘’All Diamond Paintings’’ utilizes secure packaging techniques. This guarantees that your artwork remains protected during transit and arrives ready to be enjoyed.
Satisfaction Guarantee
All Diamond Paintings is committed to delivering an exceptional experience. we offer a satisfaction guarantee, ensuring that if you’re not completely satisfied with your custom diamond painting, we will work with you to make it right.
How Long Does Custom Diamond Painting Last?
Diamond paintings are known for their longevity and durability, offering a lasting beauty that can be enjoyed for years to come. When properly created and cared for, a custom diamond painting can last a lifetime. The adhesive canvas, high-quality resin diamonds, and protective sealant ensure that the artwork remains intact and vibrant over time.
Additionally, the use of UV-protective frames or display cases can further extend the lifespan by shielding the painting from harmful sunlight exposure. So, whether you choose to hang it on your wall or gift it to a loved one, a custom diamond painting is a cherished creation that will endure the test of time.
In summary, a custom diamond painting offers the freedom to create unique and personalized artwork, making it a more meaningful and engaging alternative to traditional diamond paintings. It allows you to unleash your creativity, tailor the design to your preferences, and create a truly special piece of art that holds sentimental value.


