You have just arrived from a vacation of a lifetime or a fun night out, and you loaded your cell phone with great photos. It’s nice to have a full gallery until you realize your memory is full, and there’s no more room for capturing memories. Then what? Well, obviously, you have to transfer all that you have captured to a safe place, which for most people is a PC. Some smartphones, like iPhone, require special software for transferring photos, which in some cases seems just too complicated, and naturally, you want to find a way to avoid this.
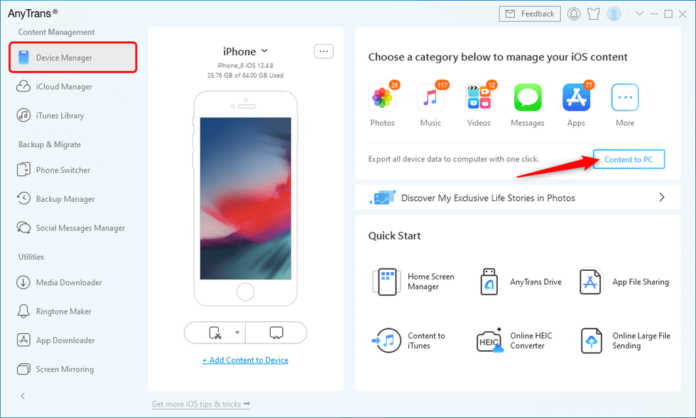
If the reason for searching for a way to transfer photos avoiding installing iTunes, you should know there are other alternative software like WinXDVD that can also do the trick. However, there are other ways to transfer, and this article will give you a detailed explanation of how to manage this.
If you’re using MAC, here’s how you’ll do it…
- Connect your device to your computer.
- Allow it to connect to your computer – to do so, type in your mobile phone unlock password (if you have one), and select Trust this computer.
- As you enter the photo location and select the ones you want to transfer, continue with clicking Import selected. At this point, you can choose whether or not to keep the original photos on your phone by selecting the Keep or Delete icon. Deleting original photos from your device will give you a lot of free memory, so if this is what you need, choose accordingly.
- When finished, disconnect the cable from your computer and phone. And that’s all it takes.
- There’s one more option to transfer photos on your computer, and it’s by using the AirDrop tool. If you’re familiar and more comfortable with transferring like this, do so.
But, if you’re a Windows user, here’s what to do…

- You can transfer images after unlocking your device with a password and allowing the computer and your smartphone to connect.
- After connecting your device, go to the My computer folder on your computer – if it’s not on your desktop, open any folder and you’ll find it on the left side of the screen.
- Double-click to select the folder with the name of your device. That folder will be located within the Devices and Drives section. If the folder does not appear, disconnect the device from the USB cable and turn it on again. If it still doesn’t appear, type ‘Devices and printers’ into your computer’s search engine, and choose to Troubleshoot – this will cause your device to appear in folders.
- After opening your device folder, select the Internal Storage folder.
- Double-click to select DCIMfolder.
- Then just choose the photos you want to be transferred.
- When finished, disconnect the cable from your computer and cell phone.
If you can’t import images to a computer or it doesn’t recognize the device as a camera after all the attempts, you’ll need to update your device or find another computer. Some versions may not be able to import videos larger than 500 MB without proper software installed. So, keep this in mind if your transfer fails, and you do not know the reason why.
These are some basic guides to help you transfer your photos to a safe place and unburden the memory on your device. If, for some reason, you still have trouble transferring photos to your computer after all these steps, try using an alternative software like the one we have mentioned at the beginning of the article.

Also, keep in mind that you can use some techniques to go avoid using any software, or connect your device to a computer. There are times when you’re desperate for unburdening your memory and to make things worse, you do not have a cable with you. In that case try some smart ways to work around the problem, like sending a few photos via your email and then downloading them to your computer. Or sending them to some social media platform, then logging in via PC and downloading photos to it.
In addition to all that was mentioned, you can also use a service that serves to synchronize and backup files and folders that you have on your devices. Install it on your device and transfer photos to it. Most of these services you can also approach via the computer, and it will have all the photos and other data you have synchronized, there.
People around the world are obsessed with the abilities and features devices produced by Apple have, and it’s no wonder… The photos are simply too good. However, every now and then there are some issues with updating, transferring, especially if you live in countries other than the USA, the EU, and so on. Then the top-class camera it has started being a complication. Such devices do not come with the possibility of extending the memory by buying an additional memory card. So, there is no other way than to transfer files from time to time and make sure you have enough memory to use.

Just as developers of these super-popular devices introduce new models of their smartphones every year, this technology giant is also introducing a new version of the operating system for its phones. With them, tons of new, cool things to use also come. In order to learn about all of them, one needs to be updated and read about them.
So, with each new version comes new options with which the phones get additional features. While some new options are well known to everyone, there are also a number of lesser-known but extremely useful options that a large number of users are unaware of. So, make sure you follow the news to learn about what the newest devices have in stores for you, and check out the video tutorials for the useful tools you can utilize to increase your satisfaction.


